

| |
||
| |
||
| |
||
 |
||
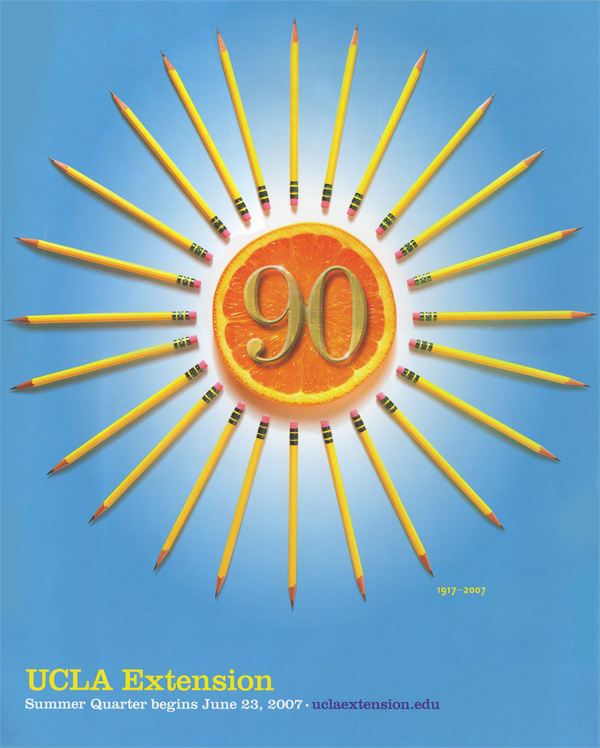
UCLA Extension cover “challenge” in-class assignmentassets can be found in the Instructors server, just copy the folder to your own folder 1. Open the file called: ucla_extension_cover_lg.jpg (we will lower the opacity of the layer as needed) 2. Make an initial selection of the pencil (Polygonal lasso + lasso) then adding/subtracting from the selection 3. Transform, rotate and scale the selection as needed 4. Add a layer mask to hide the white background 5. Color correct the pencil, adjusting the contrast, as needed (Cmd U) 6. Create an array of pencils that go around the center (see process below) a. Open the info panel b. First, to practice the array process, open the file I've given you called: demo_pencil_array_starter.psd c. View the rulers (Cmd R) and dragging out guides to determine the center d. Lock the guides (View>Lock Guides) e. Position the first pencil at the top of the document (take a snapshot in the history panel at this point) f. Then hold down Cmd + Opt + T to make a duplicate of the pencil, zoom in a little (Cmd +) g. Then move that center registration point by holding down (Opt) and move it to the center of the page which was determined by the intersection of the guides h. Then carefully rotate the pencil by positioning your cursor outside the pencil until you see the rotate icon then rotate this i. then commit to the transformation by hitting return (MAC) j. next, to create the next pencil and ultimately the rest of the array hold down: Cmd Opt Shift T, repeat over and over 7. Make a selection of the orange slice, transform it, then adjust the color balance (Cmd B) and Hue & Saturation (Cmd U) 8. add a orangey drop shadow using the layer effects in the layers panel on a separate layer add a radial gradient using the gradient tool, 9. name the layer: gradient 10. find a font close to the one in the picture or use what the font (www.myfonts.com/WhatTheFont) 11. find a texture on the Internet that matches the one on the image, save it and open it in PS then define it as a pattern 12. type out the "90" using your chosen font (I used Century Schoolbook), adjust kerning (character panel) and color 13. Then go to Layer Effects (bottom of the Layers palette) and add a pattern overlay(scale it) and color overlay as needed 14. Add a bevel and emboss and drop shadow 15. Add tiny highlights using the brush tool in white on a layer above the "90" text 
|
|

 Download pdf file.