 |

 sites of the day: Animator vs. Animation by Alan Becker sites of the day: Animator vs. Animation by Alan Becker
 Animating in Animate CC
 Animation overview Animation overview
 Lecture and Demo on Animating Lecture and Demo on Animating
- classic tweening
- animating color effects
- animating graphics that change size using the Transform Panel or Free Transform tool
- animating rotations
- Ball Bounce demo and click here for assets
 Animating in Adobe Animate Animating in Adobe Animate

Animation is the rapid display of a sequence of images of 2-D or 3-D artwork or model positions in order to create an illusion of movement. It is an optical illusion of motion due to the phenomenon of persistence of vision.
Traditional hand-drawn animation simulates motion by displaying drawings at different stages of a motion. Frame-by-frame animation (a.k.a. Traditional or Cel Animation), is the basis for what Animate CC does. The traditional animators who worked for companies like Walt Disney, had to create hundreds of images, each slightly different from the next to create the movement of each character or element in a cartoon. Then the drawings were captured on film at 24 fps (frames per second) and when played back, motion was simulated.
Animate CC works in the same way, each frame contains content that when the computer plays back in rapid succession creates movement. We are lucky however in that the computer will interpolate the movement between 2 objects instead of us having to painstakingly draw each and every frame. Each frame can consist of content shown on different layers much like the concept of using cels in traditional animation.

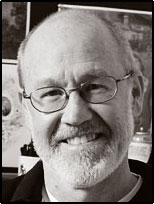
Glen Keane

Glen Keane was born on April 13, 1954 in Philadelphia, Pennsylvania, the son of cartoonist Bil Keane, creator of the The Family Circus, and Thelma "Thel" Carne Keane. He was raised in Paradise Valley, Arizona.
Keane's interest in art developed as a child by observing his father's work as a cartoonist. In his early attempts to draw, his dad gave him a copy of Burne Hogarth's Dynamic Anatomy, and instructed him to analyze the body forms and the creative approach to life drawing. After high school, Glen applied to the California Institute of the Arts-School of Art, opting out of accepting a football scholarship from another college. In a lucky twist of fate, his application was accidentally sent to the Program in Experimental Animation (then called Film Graphics), where he was mentored under the now-renowned animation teacher, Jules Engel.
Keane left CalArts in 1974 and joined Disney the same year. His debut work was featured in The Rescuers as an animator for the characters of Bernard and Penny, alongside the famed Ollie Johnston (one of ). He then went on to animate Elliott the Dragon in Pete's Dragon. Keane animated the climactic bear showdown in The Fox and the Hound. In 1982, after being inspired by the groundbreaking film Tron, he worked with director John Lasseter (Toy Story, Toy Story 2) on Where the Wild Things Are, a 30-second test greenlighted by Tom Willhite that integrated traditional character animation and computer-generated backgrounds. But the project turned out to be too expensive, and the studio was unwilling to invest further in the planned featurette. Where the Wild Things Are was revolutionary for its time, and a predecessor to the famous .

In 1983 Keane left Disney as a contracted employee and worked as a freelance artist. During this time he worked on the character of Professor Ratigan in Disney's The Great Mouse Detective. He also did some work on The Chipmunk Adventure. He returned to Disney to work on the characters of Fagin, Sykes and Georgette for Oliver & Company. Keane rose to lead character animator, becoming one of the group sometimes referred to as the "Nine New Men". In this post he was responsible for animating some of Disney's most memorable characters in what has been referred to as the "New "Golden Age" of Disney Animation.
Keane designed and animated the character of Ariel in the 1989 film The Little Mermaid. Then the eagle Marahute in The Rescuers Down Under. Subsequently, Keane worked as the supervising animator on the title characters for three Disney hit features: Aladdin, Beauty and the Beast and Pocahontas.
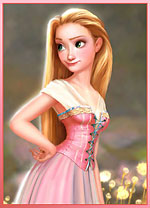
While living with his family in Paris, France for three years, Keane completed work on Disney's 1999 Tarzan for which he drew the eponymous character. Keane then returned to Disney's Burbank studio as the lead animator for Long John Silver in Treasure Planet. In 2003 Keane began work as the director of Disney's CGI animated film, Tangled. In Tangled, Glen and his team bring the unique style and warmth of traditional cel animation to computer animation.
The film was made using CGI, though Tangled will resemble traditional oil paintings on canvas: "There’s no photoreal hair. I want luscious hair, and we are inventing new ways of doing that. I want to bring the warmth and intuitive feel of hand-drawn to CGI.
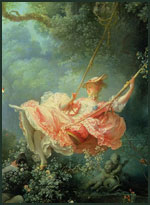
For
inspiration, Keane and his animators are referencing a painting by French Rococo artist Jean-Honoré Fragonard, The Swing, applying a certain richness that they have never attained in animation before."

Check out these Glen Keane videos on YouTube:
- Glen Keane lectures on YouTube

Today: Classic Motion Tweening
The Timeline/Identifiers and Keyframes
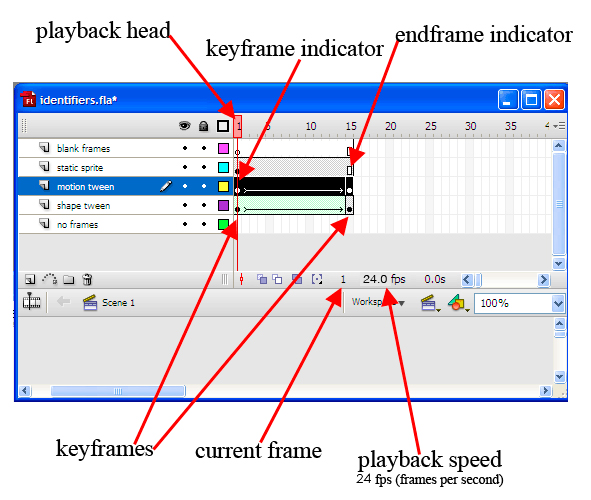
Definition of a Keyframe: a keyframe indicates that something important happens at the point in the timeline where
the keyframe is located. Content is displayed or we make something disappear, or we make a transition from one piece
of content to another. Keyframes are markers in time, indicating start and end points for different pieces of action.
- Animate CC works with keyframes, represented on the timeline as a black dot.
- Blank keyframes, which have nothing in them, are represented by solid white.
- A motion “tween” is purple and a shape “tween” is light green.
- The end of a series of frames is a small open square called an endframe indicator.

Depending on your keyboard you might have to the FN (function key) to the keyboard shortcut
Inserting Frames/keyframes:
To insert a frame click F5, or Insert frame.
To insert a keyframe click F6, Insert Keyframe.
To insert a blank keyframe click F7, or Insert Blank Keyframe.
Deleting Frames/keyframes:
To delete a frame click shift F5, or Modify > Timeline >Delete frame
To delete a keyframe click shift F6, Modify > Timeline > Delete Keyframe.
To delet a blank keyframe click shift F7, or Modify > Timeline > Delete Blank Keyframe.

Creating animation overview
You create animation by changing the content of successive frames. You can make an object move across the Stage, increase or decrease its size, rotate, change color, fade in or out, or change shape. Changes can occur independently of, or in concert with, other changes. For example, you can make an object rotate and fade in as it moves across the Stage.
There are two methods for creating an animation sequence in Animate CC: frame-by-frame animation and motion-tweened animation. In frame-by-frame animation you create the image in every frame. In tweened animation, you create starting and ending frames and let Animate CC create the frames in between. Animate CC varies the object's size, rotation, color, or other attributes evenly between the starting and ending frames to create the appearance of movement.
Tweened animation is an effective way to create movement and changes over time while minimizing file size. In tweened animation, Animate CC stores only the values for the changes between frames. In frame-by-frame animation, Animate CC stores the values for each complete frame.
Tweening instances, groups, and type:
To tween the changes in properties of instances, groups, and type, you use motion tweening. Animate CC can tween position, size, rotation, and skew of instances, groups, and type. Additionally, Animate CC can tween the color of instances and type, creating gradual color shifts or making an instance fade in or out. To tween the color of groups or type, you must make them into symbols.
If you change the number of frames between the two keyframes, or move the group or symbol in either keyframe, Animate CC automatically tweens the frames again.
You can create a motion tween using one of two methods:
 |
Create the starting and ending keyframes for the animation and use the Motion Tweening option in the Frame Properties panel. |

|
Create the first keyframe for the animation, and then choose Insert > Create Motion Tween and move the object to the new location on the Stage. Animate CC automatically creates the ending keyframe. |
When tweening position, you can make the object move along a nonlinear path. 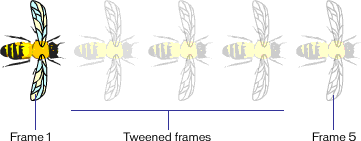
The bee's second, third, and fourth frames result from tweening the first and last keyframes.

Representations of animations in the Timeline
Animate CC distinguishes tweened animation from frame-by-frame animation in the Timeline as follows:
|
Motion-tweened keyframes are indicated by a black dot and intermediate tweened frames have a black arrow with a light blue background.
 |
|
Shape-tweened keyframes are indicated by a black dot and intermediate frames have a black arrow with a light green background.
 |
|
A dashed line indicates that the final keyframe is missing.
 |
|
A single keyframe is indicated by a black dot. Light-gray frames after a single keyframe contain the same content with no changes and have a black line with a hollow rectangle at the last frame of the span.
 |
|
A small a indicates that the frame has been assigned a frame action with the Actions panel.
 |
|
A red flag indicates that the frame contains a label or comment.
 |

Animating a Bouncing Ball
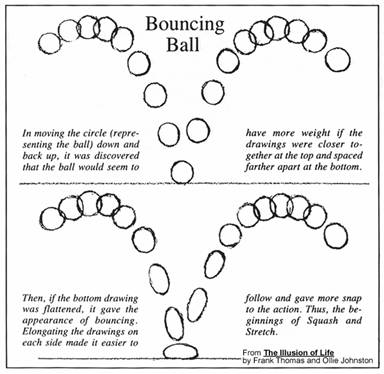
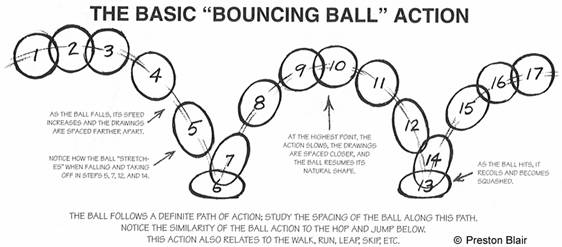
Here are two explanations of animating a bouncing ball.
1.

2.

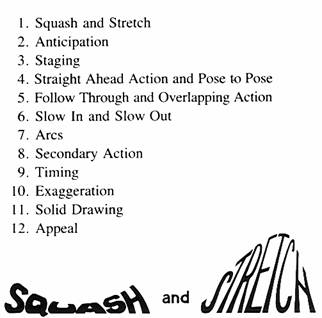
Basic Animation Principles

Animating a Bouncing Ball: In-class demo

Tutorial of a bouncing ball
- Open a new file (Ctrl+N)
- Change your background color to anything other than white. (Modify > Movie)
- Make a ball using the circle tool constraining it to a perfect circle by holding down the shift key while drawing it on the stage.
- Fill it with a radial gradient in the color panel
- Notice how Animate CC placed a black dot in frame 1 of layer 1. This is a keyframe.
- Rename Layer 1 to ball.
- Create a new layer and name it ground. Using the rectangle tool draw a rectangle near the bottom of the stage to represent the ground. This is what the ball will bounce off of.
- Move the ground layer under the ball layer.
- Select the ball on the stage with the arrow tool and move it to above the stage in the grey working area.
- Make this ball into a symbol by clicking F8 on the keyboard or by going to Insert > Convert to Symbol. This will bring up the Symbol Properties box. Name the symbol ball. Behavior is graphic. Hit OK. Notice the cross hairs in the center of the ball, this shows it is now a symbol and not just a vector graphic.
- Now go “inside” the symbol by double clicking on the ball on the stage., or in the Library double click on the picture or the name. Now move the ball so the crosshairs are at the bottom of the ball. Go back to scene 1.
- In the timeline, click on frame 10 of the ball layer. Click F5 or go to Insert > Frame
- Do the same for the ground layer.
- Add a keyframe in frame 10 of the ball layer by putting your cursor in frame and hitting F6.
- Select the keyframe in frame 10 by clicking on the black dot in frame 10 of the timeline.
- Using the arrow tool, move the ball down the stage till it is even with the bottom of the frame of the stage. Zoom in to make sure it is right on the ground.
- Now click on frame 20 on the timeline. Add a keyframe there by hitting F6.
- By dragging the red playback head located in the numbered area above the timeline you can see that frame 1’s position lasts on the stage until frame 9 then at frame 10 it changes to frame 10’s position. Use the playback head whenever you want to “scrub” through your animation to see what it looks like. You can also hit play (enter) while on the stage to see the animation play from frame 1 to the end.
- Select frame 20 of the ball layer and using the arrow tool, move the ball up until it is out of the frame of the stage, in the grey work area.
- Now you must “tween” the animation. There are 3 ways of doing this:
- Click on the 1st keyframe or anywhere on the timeline between the two keyframes and you will get a hand. Then you can go to Insert > Create Motion Tween.
- Click on the 1st keyframe or on the timeline between the two keyframes and you will get a hand. Then you can go to the Frame Panel and choose Tweening, and pull down the menu till you see Motion and choose that.
- Click on the 1st keyframe or on the timeline between the two keyframes and you will get a hand. Make sure your mouse is on the timeline. Right click with your mouse and choose Create Motion Tween.
- Now test your movie by hitting Ctrl+Enter or going to Control>Test Movie
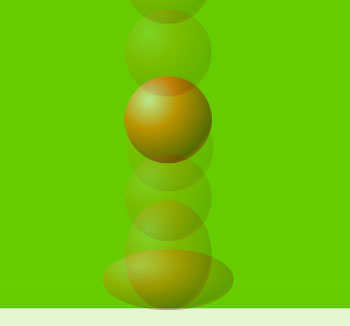
- Now we will make the animation look more realistic by adding a stretch and a squash. Do this by adding a keyframe at frame 9 and frame 11(click in frame 9 and hit F6, same for frame 11).
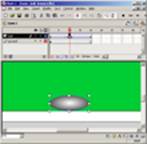
- We want our ball to “squash” at frame 10 so click on frame 10 and go to the scale tool and “squash” the ball by moving the top middle square down and make it wider by grabbing the square on the side of the ball and pulling it out. Notice that because we repositioned are center axis the ball squashes correctly in relation to the ground.

- Click on onion skinning on the bottom left side of the timeline to see your movie’s layers, or click on outline to see your animation in outlines.
- Also, while you are on the main stage you can advance your animation frame by frame by using the < and > keys on the keyboard..
|


![]()
![]()
