 |

 Announcements: Announcements:
- Adobe Audition: Make and import music loops or sound effects into your piece. Remember Animatekit.com is a good resource for sound loops and effects.
- Take drawing, animation and painting classes where the pros do:
- The Animation Union (Guild) #839 in Burbank
- AAI - American Animation Institure: click here for to see class schedule

To create frame-by-frame animation:
1 |
Click a layer name to make it the current layer, and select a frame in the layer where you want the animation to start. |
2 |
If the frame isn't already a keyframe, choose Insert > Keyframe to make it one. |
3 |
Create the image for the first frame of the sequence. |
|
You can use the drawing tools, paste graphics from the Clipboard, or import a file. |
4 |
Click the next frame to the right in the same row and choose Insert > Keyframe, or right-click (Windows) or Control-click (Macintosh) and choose Insert Keyframe from the Frame pop-up menu.
Creating frame-by-frame animations
Frame-by-frame animation changes the contents of the Stage in every frame and is best suited to complex animation in which an image changes in every frame instead of simply moving. Frame-by-frame animation increases file size more rapidly than tweened animation.

Use frame-by-frame animation when you need to change an image in each frame.
|
Onion skinning
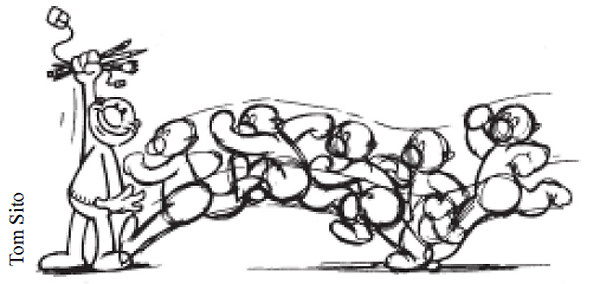
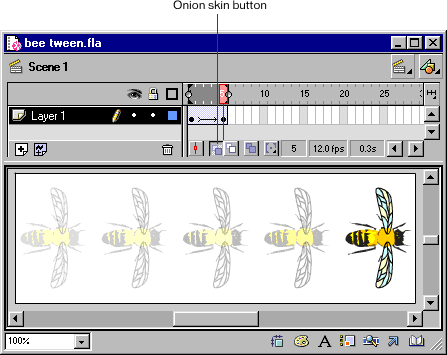
Normally, Animate CC displays one frame of the animation sequence at a time on the Stage. To help you position and edit a frame-by-frame animation, you can view two or more frames on the Stage at once. The frame under the playhead appears in full color, while surrounding frames are dimmed, making it appear as if each frame were drawn on a sheet of translucent onion-skin paper and the sheets were stacked one on top of another. Dimmed frames cannot be edited.
To simultaneously see several frames of an animation on the Stage:

Click the Onion Skin button. All frames between the Start Onion Skin and End Onion Skin markers (in the Timeline header) are superimposed as one frame in the Movie window.

To control onion skinning display, do any of the following:

|
To display onion skinned frames as outlines, click the Onion Skin Outlines button.
 |

|
To change the position of either onion skin marker, drag its pointer to a new location. (Normally, the onion skin markers move in conjunction with the current frame pointer.)
|

|
To enable editing of all frames between onion skin markers, click the Edit Multiple Frames button. Usually onion skinning lets you edit only the current frame. However, you can display the contents of each frame between the onion skin markers normally, and make each available for editing, regardless of which is the current frame.
 |
Note: Locked layers (those with a padlock icon) aren't displayed when onion skinning is turned on. To avoid a multitude of confusing images, you can lock or hide the layers you don't want onion skinned.
To change the display of onion skin markers:
Click the Modify Onion Markers button and choose an item from the menu:
 |
Always Show Markers displays the onion skin markers in the Timeline header whether or not onion skinning is on. |

|
Anchor Onion Marks locks the onion skin markers to their current position in the Timeline header. Normally, the Onion Skin range is relative to the current frame pointer and the Onion Skin markers. By anchoring the Onion Skin markers, you prevent them from moving with the current frame pointer. |

|
Onion 2 displays two frames on either side of the current frame. |

|
Onion 5 displays five frames on either side of the current frame. |

|
Onion All displays all frames on either side of the current frame. |


|


