|

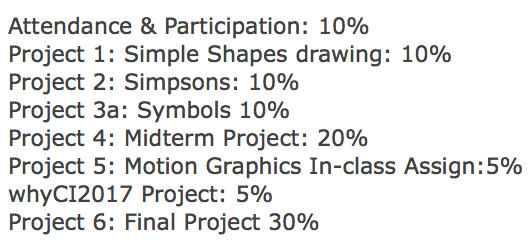
Full list of Assignments(subject to change):
Project 1: Simple Shapes drawing
Project 2: Simpsons
Project 3:
Project 3a: Symbols
Project 4-Midterm: Bunnybot Animated
Project 5: Motion Graphics Assignment (started in class, completed as per directions in class, for homework)
WhyCI Project
Project 6: Final Project: 1 minute music video or trailer/opening title sequence (1280x720px) 24 fps
-------------------------------------------------
---------------------------------------------------------------------------------------------------------------------------------------------------------

- Project 1: Drawing Shapes and Objects in Animate (lines only, no fills)
Due: Tues. Jan 31, 2017
Name your file: lastname_proj1.fla
Using the image of simple shapes, Mike Hollingsworth characters and Mickey Mouse below, draw the simple shapes using the drawing tools in Animate. Use the line tool, pencil tool, rectangle tool, & oval tool. Also try duplicating objects and transforming (scaling and rotating) them.
Make the stage larger 2200 x 1200px. Try to create all of the drawings on one layer, for shapes with overlapping shapes, utilize the pasteboard to create the shape, then move it into place with the selection tool.
- Remember to name your layers (points will be deducted for unnamed layers)
- Optimize lines by selecting the lines/curves with the selections tool(v) then clicking on the smooth option (which is an option at the bottom of the the toolbar when the selection tool is chosen). This will elimate excess points to "optimize" your graphics. Be careful not to optimize too much as this will sometimes elminate needed detail from the drawing.
Simple Shapes #1
Mike Hollingsworth Characters (line and color/gradient fills):

-------------------------------------------------------------------------------------------------------------------------------------------------------------

Goal: to learn how to draw enclosed shapes with the line tool instead of the pencil or brush tool creating optimized drawn lines that can be fillled with colors derived from the Simpons color palette using the eye dropper.
save file as: lastname_proj2.fla
Due:Tues. Feb. 7th beginning of class. Drop in the dropbox, per my instructions when you get to class.
Please use the image directly below and use the colored example from the website (above) as reference for the colors.
Use the outline image below for the project and the image above for color matching.
------------------------------------------------------------------------------------------------------------------------------------------------------------

Due date: Thurs. Feb. 16
name: lastname_proj3a.fla
Create an drawing of a complex robot in Animate that utilizes a minimum of 6 different symbols. Past examples will be shown in class. I should be able to go into the Library to see your symbols there. Your drawing, done in Animate must be at an intermediate or advanced level. The symbols will utilize graphic or movie clip symbols. An example (not a robot but a good example of the process) might be if you choose a tree like the example by Rob Matzat below, each part of your object (tree) will be a symbol, i.e the trunk, the branches, the fruit(your choice), clouds in the sky, grass, hills, small animals.
Each type of symbol must be on it's own separate "named" layer. Use create symbol (Cmd + F8) to make a new symbol or convert symbol (F8) to make your hand drawn shapes into symbols. You simply select the shape on the stage first then click: F8, then name your symbol, choose graphic symbol and click OK. The shape has now been converted into a symbol and it has now been added to your Library (Ctrl+L). Please name all symbols that you create.
Once you have created a symbol, an instance can be dragged out from the library many times. This is called making an instance(copy) of the symbol. Now that it is a symbol it will only have to be downloaded once, which is the beauty of symbols.
If you need to "edit" that symbol, double click it on the stage or double click on the picture or name in the library.
You also MUST use "color styles" in the Properties panel to change the brightness, tint, alpha or a combination of all 3-just remember to select the symbol first and go the Properties panel to do this. Also use free transform to alter the size, skew and rotation of "instances" of the symbol.
------------------------------------------------------------------------------------------------------------------------------------------------------------

Due: Tuesday March 13th at the beginning of class, we will have a class critique that day.
I will allow in-class time to work on the assignment.
Taking the Bunnybot .psd started in class, create a 30 second (720 frames) or slightly longer if you want, and animation in Adobe Animate. Use symbols and animated symbols (movieclips or animated graphics) and nested animations.
Size: 1280x720px.
Think of a compelling and interesting concept for your animated short.
Import an image for the background (or create one yourself) so that the animation is set in some unique locale.
Use classic and/or motion tweening, classic motion guides as needed and anything that we have learned in the class so far.
Try to use bones to animate at least one part of the robot.
There must be at least one other element in the scene that you draw yourself that the character interacts with in some way.
Duplicate symbols as needed for your unique and stunning idea.
You may change the symbol properties of the bunnybot (tint, brightness, alpha and/or transform it as you see fit).
Name file: lastname_proj4.fla, also hand in an .mp4 or .mov video file as demoed in class 3/9.
------------------------------------------------------------------------------------------------------------------------------------------------------------

------------------------------------------------------------------------------------------------------------------------------------------------------------

Create a 1 minute music video or trailer/opening title sequence (1280x720px) @ 24 fps for:
- a music video, or
- an as-yet unreleased movie, game, tv show etc.
Utilize any/all the animation skills you have learned during the semester to create your project. The contents of this project will include music, motion graphics, still images, and Animate animations (movieclips and/or animated graphics) and transitions compiled in Animate on the timeline using layers. 10% of your grade for this project will be to write a short 1 paragraph description of your project which you will email the professor (lizking@csuci.edu) by the end of the 15th week of classes.
due: Tues. May 16, 2017-critique
PRESENTATION of your final project: Tues. May 16, 2017, Broome 1760
- 1280 x 720px
- 24 fps = 1440 frames or adjust your frame rate according to the frames per second(fps)
- music-edited (cropped or effects added) in Adobe Audition--if needed (choose your music early and animate to it).
- hand in both the .fla and the .swf and most importantly an .mov(converted) or and .mp4 file (Adobe Media Encoder)
| 

